


How to Make Dubai Chocolate at Home: The Complete DIY Guide to Pistachio Kataifi Chocolate Bars
Can't get your hands on Fix Dessert Chocolatier's viral Dubai chocolate? Tired of constant sell-outs and premium prices? Ready to take matters into your own hands? This comprehensive guide will teach you everything you need to know to make professional-quality Dubai chocolate bars at home.
While we can't promise your homemade version will be identical to Fix's carefully perfected recipe, we can help you create something delicious, impressive, and satisfying. Thousands of home cooks have successfully made Dubai chocolate using the techniques we'll cover. Some have even started small businesses based on their homemade versions.
This isn't just a recipe—it's a complete course in Dubai chocolate making. We'll cover ingredient sourcing, equipment needs, multiple recipe variations, professional techniques, troubleshooting, cost analysis, scaling for gifts or parties, and even how to package your creations beautifully. Whether you're making one bar for yourself or fifty for a wedding, this guide has you covered.
Table of Contents
- Why Make Dubai Chocolate at Home?
- Complete Ingredient Guide
- Essential Equipment and Tools
- Fundamental Chocolate Techniques
- The Master Recipe: Classic Pistachio Kataifi
- Perfecting Pistachio Cream
- Working with Kataifi Pastry
- Chocolate Tempering: Complete Guide
- Assembly Techniques
- Troubleshooting Common Problems
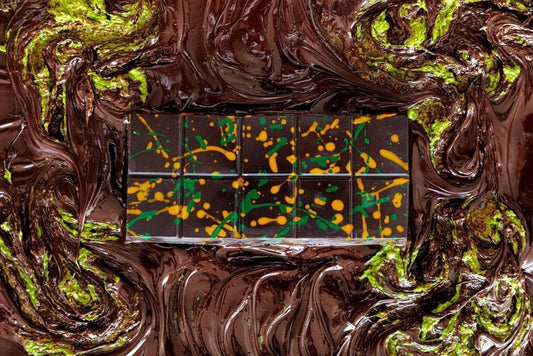
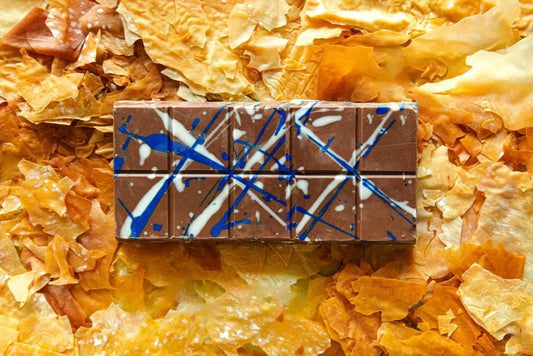
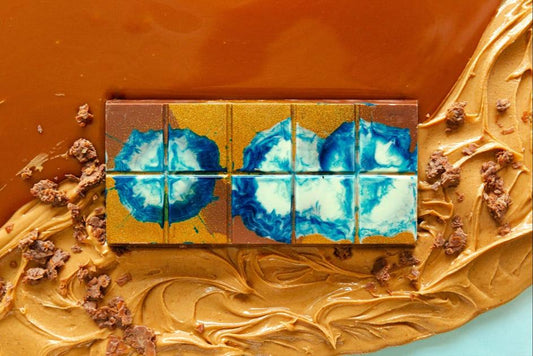
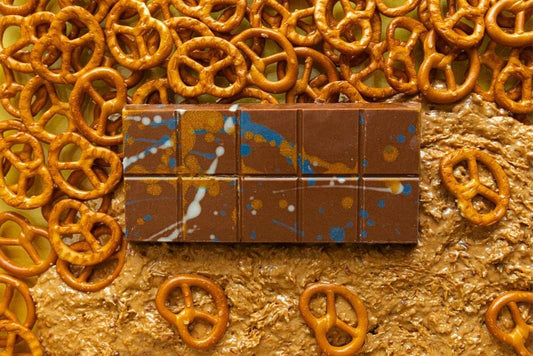
- Flavor Variations and Recipes
- Scaling Up: Making Multiple Bars
- Storage and Shelf Life
- Packaging and Gift Presentation
- True Cost Analysis
- How Close Can You Get to Fix?
- Can You Sell Homemade Dubai Chocolate?
- Advanced Techniques for Perfectionists
- DIY Frequently Asked Questions
1. Why Make Dubai Chocolate at Home?
Before we dive into the how, let's establish the why. Understanding your motivation helps you set appropriate expectations and effort levels.
The Case for DIY
Cost Savings (Maybe):
- Fix chocolate: $20 per bar
- Homemade: $6-12 per bar depending on ingredient quality
- Savings: $8-14 per bar
- BUT: First batch requires equipment investment
- Break-even point: After making 10-15 bars
Availability When Fix Is Sold Out:
- No waiting for restocks
- Make whenever you want
- Control your own supply
- Great for last-minute gifts
Customization:
- Adjust sweetness to your preference
- Create unique flavors Fix doesn't offer
- Accommodate dietary restrictions
- Make exactly the size you want
- Control ingredient quality
Skill Development:
- Learn valuable chocolate-working techniques
- Understand tempering (useful for all chocolate projects)
- Impressive party trick
- Potential business opportunity
Gift-Giving Impact:
- Homemade gifts feel more personal
- Can make larger quantities for events
- Customize for individual recipients
- Tell the story of making it yourself
Fun and Satisfaction:
- Enjoyable cooking project
- Satisfaction of creating viral sensation yourself
- Great activity with kids or friends
- Understanding what goes into the product
The Case Against DIY
Honesty time: making Dubai chocolate at home isn't always the best choice.
Time Investment:
- First attempt: 4-6 hours including prep and cleanup
- Learning curve means early attempts may fail
- Tempering alone can take 30-60 minutes
- Setting time adds hours (though hands-off)
Skill Requirements:
- Chocolate tempering is tricky for beginners
- Temperature control is critical
- Working with sticky pistachio butter is messy
- Precision matters for professional results
Equipment Costs:
- Initial investment: $50-150 for proper equipment
- Thermometer alone: $15-40
- Molds, tools, etc. add up
- One-time cost but significant
Quality Gap:
- Homemade rarely matches commercial perfection
- Consistency batch-to-batch is challenging
- Professional appearance is hard to achieve
- 70-85% of Fix quality is realistic goal
Ingredient Availability:
- Kataifi may be hard to find locally
- High-quality pistachio butter is expensive
- Some ingredients require specialty shopping
- Shipping costs can be significant
Who Should DIY?
Perfect Candidates:
- Enjoy cooking and baking as hobbies
- Want to learn new techniques
- Need multiple bars (scaling justifies effort)
- Can't access Fix products at all
- Want to customize flavors
- Have time and patience
- Looking for unique gift ideas
Consider Alternatives If You:
- Only want 1-2 bars
- Don't enjoy cooking
- Value time highly (your time is worth more than savings)
- Get frustrated easily with detailed processes
- Can access authentic Fix
- Don't have kitchen space for chocolate work
Setting Realistic Expectations
What Homemade Can Achieve:
- Delicious flavor that captures the essence
- Impressive presentation (with practice)
- Cost savings on multiple bars
- Satisfaction of DIY accomplishment
- Good enough to gift proudly
What Homemade Can't Match:
- Perfect commercial consistency
- Identical texture to Fix's formulation
- Professional equipment results
- Exact Fix recipe (proprietary)
- The convenience of just buying it
If you're ready to accept these realities and excited to try anyway, let's get started!
2. Complete Ingredient Guide
The quality of your ingredients directly determines the quality of your final product. Here's everything you need to know about sourcing and selecting ingredients.
The Chocolate
This is the foundation. Don't cheap out here.
What to Buy:
- High-quality couverture chocolate (real chocolate, not compound)
- Milk chocolate for classic version (30-40% cocoa)
- 12-16 oz (340-450g) for 4-6 bars
Recommended Brands:
- Callebaut: Professional standard, excellent tempering properties ($15-20/lb)
- Valrhona: Premium quality, exceptional flavor ($20-30/lb)
- Guittard: American brand, good quality/price ratio ($12-18/lb)
- Ghirardelli: More accessible, decent results ($10-15/lb)
Where to Buy:
- Specialty baking stores
- Online: Amazon, Chocolate Trading Company, Pastry Chef Central
- Some Whole Foods carry Valrhona
- Restaurant supply stores
Forms Available:
- Fèves/pistoles (disk shape) - BEST for melting and tempering
- Blocks - need to chop, but work fine
- Chips - contain stabilizers, NOT recommended
What NOT to Use:
- Chocolate chips (contain stabilizers that prevent proper melting)
- Compound chocolate/candy melts (contains vegetable oil instead of cocoa butter)
- Very cheap chocolate (waxy taste will ruin final product)
Pistachios and Pistachio Products
The star ingredient deserves special attention.
Option 1: Pistachio Butter/Paste (Easiest)
- Pre-made pistachio butter or paste
- Smooth texture, no grinding required
- Cost: $12-25 for 8-12 oz
Recommended Brands:
- Wilderness Poets: 100% pistachios, super smooth
- Artisana: Organic, creamy
- Nuts to You: Canadian brand, excellent quality
Where to Buy:
- Natural food stores
- Amazon
- Specialty nut butter shops
- Middle Eastern markets (sometimes have imported brands)
Option 2: Make Your Own from Whole Pistachios
- More economical if making large batches
- Control over roasting and texture
- Requires powerful food processor or blender
What to Buy:
- Shelled, roasted, unsalted pistachios
- 2-3 cups (300-450g) needed
- Cost: $8-15 per pound
Best Sources:
- Costco/Sam's Club (best price for bulk)
- Trader Joe's (good quality/price)
- Nuts.com (online, excellent quality)
- Middle Eastern markets
Processing Method:
- Use roasted pistachios (or roast at 350°F for 8-10 minutes)
- Cool completely
- Process in high-powered food processor
- First turns to powder (5 minutes)
- Then clumps (another 5 minutes)
- Finally smooths to butter (5-10 more minutes)
- Scrape down sides frequently
- Be patient - rushing gives grainy texture
Equipment Needed:
- High-powered food processor (minimum 700W)
- OR Vitamix/Blendtec high-speed blender
- Regular blenders usually can't handle this
Kataifi Pastry
The magic ingredient that creates the signature crunch.
What It Is:
- Shredded phyllo dough (looks like shredded wheat)
- Middle Eastern/Greek pastry ingredient
- Also called kadaif, kunafa, or konafa
Where to Find:
- Middle Eastern grocery stores (most reliable)
- Greek/Mediterranean markets
- Some specialty grocers
- Amazon (more expensive but convenient)
- International sections of large supermarkets (rarely)
Forms Available:
- Fresh/frozen in refrigerated section - BEST quality
- Shelf-stable packages - more convenient, slightly drier
Cost: $5-10 for 1 lb (enough for 8-12 bars)
Substitutes If You Can't Find Kataifi:
- Phyllo dough sheets - shred very finely with scissors or knife (closest)
- Angel hair pasta - break into tiny pieces, toast well (different texture but works)
- Crushed cornflakes - toasted (very different but provides crunch)
- Crushed Biscoff cookies - for Biscoff variation (changes flavor profile)
Note: Nothing perfectly replicates kataifi, but phyllo shreds come closest.
Tahini
Secret ingredient for authentic Middle Eastern flavor and creamy texture.
What to Buy:
- Sesame tahini (paste made from ground sesame seeds)
- Hulled or unhulled both work
- Cost: $6-12 for 16 oz jar
Recommended Brands:
- Soom: Incredibly smooth, premium quality
- Seed + Mill: Artisanal, excellent texture
- Al Wadi: Middle Eastern brand, authentic
- Trader Joe's: Budget option, decent quality
Where to Buy:
- Any grocery store (usually in international or health food section)
- Middle Eastern markets
- Amazon
Sweeteners
Powdered Sugar (Confectioner's Sugar):
- For sweetening pistachio cream
- Dissolves smoothly without grittiness
- Cost: $3-5 for 2 lb box
- Available everywhere
Optional Honey:
- Adds subtle honey notes
- Helps with texture
- 1-2 tablespoons per batch
Additional Ingredients
Salt:
- Fine sea salt preferred
- Small amount enhances all flavors
- 1/4 teaspoon per batch
Coconut Oil (Optional):
- Helps thin pistachio cream if too thick
- Adds smoothness
- Refined (flavorless) preferred
- 1-3 tablespoons as needed
Vanilla Extract (Optional):
- Pure vanilla only
- Subtle background note
- 1/2 teaspoon per batch
Shopping List for First Attempt
For making 4-6 bars (first-timers start here):
- 14 oz high-quality milk chocolate ($12-18)
- 10 oz pistachio butter OR 2 cups whole pistachios ($10-15)
- 4 oz kataifi pastry ($3-5)
- 4 oz tahini ($3-6)
- 1/4 cup powdered sugar ($1)
- Pinch of salt (pantry staple)
- Optional: coconut oil, honey, vanilla (pantry)
Total Ingredient Cost: $29-45
Cost Per Bar: $7-11 (for 4 bars)
Quality Tiers
You can make Dubai chocolate at different quality/price points:
Budget Version ($5-7 per bar):
- Ghirardelli chocolate
- Store-brand pistachio butter
- Basic tahini
Standard Version ($7-10 per bar):
- Callebaut or Guittard chocolate
- Artisana or Wilderness Poets pistachio butter
- Soom tahini
Premium Version ($10-14 per bar):
- Valrhona chocolate
- Homemade pistachio butter from premium pistachios
- Seed + Mill tahini
- Organic/specialty ingredients
3. Essential Equipment and Tools
Proper equipment makes the difference between frustration and success.
Absolute Essentials (Can't Skip These)
Digital Thermometer ($15-40):
- Instant-read thermometer
- Chocolate tempering requires precise temperature control
- Accuracy to 1°F/0.5°C
- Recommended: ThermoWorks ThermoPop ($29) or ThermoPro TP03 ($15)
- Infrared gun thermometer also works ($20-30)
Chocolate Molds or Loaf Pan ($8-25):
- Option 1: Chocolate bar molds (silicone or polycarbonate)
- Look for 4-6 cavity molds in bar shapes
- Silicone easier for beginners (easier unmolding)
- Polycarbonate gives shinier finish
- Option 2: Small loaf pan lined with parchment
- 5x3 inch loaf pan works perfectly
- Line with parchment for easy removal
Heat-Proof Bowls ($10-20):
- Glass or stainless steel
- For melting chocolate
- Need at least 2 (one for chocolate, one for double boiler)
- Pyrex measuring cups work great
Silicone Spatulas ($5-15):
- Heat-resistant
- For stirring chocolate and spreading filling
- Need 2-3 in different sizes
Mixing Bowls ($10-20):
- Various sizes
- For preparing pistachio cream
- Stainless steel or glass preferred
Parchment Paper ($5):
- For lining pans
- Preventing sticking
- Wrapping finished bars
Highly Recommended (Makes Process Much Easier)
Kitchen Scale ($15-30):
- Digital, measuring in grams and ounces
- Chocolate work is more accurate by weight
- Ensures consistency
- Recommended: OXO Good Grips scale
Offset Spatula ($8-12):
- Small offset spatula
- Perfect for spreading filling evenly
- Creating smooth surfaces
Bench Scraper ($6-10):
- Metal or plastic
- Cleaning up chocolate drips
- Smoothing tops of bars
Food Processor ($50-150 if making own pistachio butter):
- Minimum 700W motor
- For grinding pistachios
- Cuisinart 14-cup is excellent choice
- Skip if buying pre-made pistachio butter
Baking Sheet ($10-15):
- For toasting kataifi
- Cooling chocolate
- Any standard half-sheet pan works
Nice to Have (Professional Results)
Marble Slab or Granite Countertop ($0-50):
- Cold surface for tempering chocolate
- Professional chocolatiers use this
- If you have granite counters, you already have it
- Otherwise, a thick marble cutting board works ($30-50)
Chocolate Dipping Fork Set ($8-15):
- For handling chocolate precisely
- Professional look
- Regular fork works but less elegant
Sieve/Strainer ($8-12):
- For dusting powder
- Sifting ingredients
- Fine mesh preferred
Piping Bags ($5-10):
- For neat filling application
- Zip-lock bags with corner cut work
- Disposable or reusable
Equipment Budget Planning
Minimal Start (Already Own Most Kitchen Tools):
- Thermometer: $15-20
- Chocolate molds: $10-15
- Silicone spatula: $5
- Parchment paper: $5
- Total: $35-45
Complete Beginner Setup:
- All the above: $35-45
- Mixing bowls: $15
- Kitchen scale: $20
- Offset spatula: $10
- Baking sheet: $12
- Total: $92-102
Professional Home Setup:
- All beginner items: $92-102
- Food processor: $100
- Marble slab: $40
- Professional thermometer: $30
- Complete tool set: $25
- Total: $287-297
Equipment You Already Have
Don't buy what you already own:
- Double boiler (or pot + heat-proof bowl)
- Measuring cups and spoons
- Wooden spoons
- Cutting board
- Sharp knife
- Oven (for toasting kataifi)
- Refrigerator/freezer
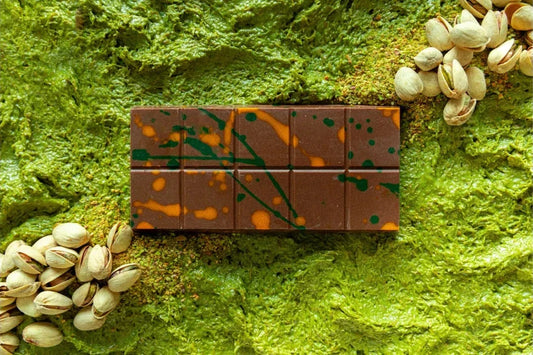
5. The Master Recipe: Classic Pistachio Kataifi
Here's the complete, tested recipe that produces results closest to Fix Dessert Chocolatier.
Ingredients
For the Chocolate Shell:
- 14 oz (400g) high-quality milk chocolate, chopped or in fèves
For the Pistachio Cream Filling:
- 1 cup (280g) pistachio butter or paste
- 1/4 cup (60g) tahini
- 3 tablespoons (25g) powdered sugar, or to taste
- 1/4 teaspoon fine sea salt
- 2 tablespoons (30ml) coconut oil (refined), optional for smooth texture
- 1 tablespoon (15ml) honey, optional
For the Crunchy Element:
- 1.5-2 cups (60-80g) kataifi pastry, loosely measured
Yields: 4-6 chocolate bars depending on mold size
Step-by-Step Instructions
PART 1: PREPARE THE KATAIFI (15 minutes)
- Preheat oven to 350°F (175°C)
-
Prepare kataifi:
- Remove kataifi from package
- Gently separate and loosen the strands
- Don't need to completely separate - some clumping is fine
- Spread on baking sheet in even layer
-
Toast until golden:
- Bake 8-12 minutes, checking every 3 minutes
- Toss/stir halfway through for even toasting
- Should turn golden brown
- Watch carefully - burns quickly!
- Should smell nutty and toasted, not burnt
-
Cool completely:
- Remove from oven when golden
- Cool on baking sheet
- Break into small pieces (1-2 inch strands)
- Set aside - do NOT add to cream yet
PART 2: MAKE PISTACHIO CREAM (10 minutes)
-
Combine base ingredients:
- In medium bowl: pistachio butter, tahini, powdered sugar, salt
- If using: add coconut oil and honey
- Mix well with spatula or electric mixer
-
Check consistency:
- Should be thick but spreadable
- Like thick frosting or peanut butter
- Too thick? Add coconut oil 1 teaspoon at a time
- Too thin? Add more powdered sugar or pistachio butter
-
Taste and adjust:
- Add more sugar if you want sweeter
- Add pinch more salt if needed
- Can add drop of vanilla extract
-
Set aside:
- Keep at room temperature
- Don't add kataifi yet!
PART 3: TEMPER THE CHOCOLATE (30-45 minutes)
Note: This is the trickiest part. Full tempering guide in dedicated section below. Here's the simplified version:
-
Set up double boiler:
- Pot with 1-2 inches of water
- Bring to gentle simmer
- Place heat-proof bowl on top (shouldn't touch water)
-
Melt chocolate:
- Put 10 oz (285g) chocolate in bowl over double boiler
- Save 4 oz (115g) for seeding method
- Stir constantly with silicone spatula
- Heat until fully melted and smooth
- Temperature should reach 113-118°F (45-48°C) for milk chocolate
- Remove from heat immediately
-
Cool chocolate (Seeding Method):
- Add reserved 4 oz chocolate to hot melted chocolate
- Stir continuously
- Chocolate will cool as new chocolate melts
- Stir until temperature drops to 80-82°F (27-28°C)
- Remove any unmelted chunks
-
Reheat slightly:
- Place bowl back over warm water (NOT simmering) for just a few seconds
- Stir constantly
- Bring temperature back up to 88-91°F (31-33°C)
- This is your working temperature
-
Test temper:
- Dip knife tip in chocolate
- Place on counter
- Should harden in 3-5 minutes
- Should be shiny, not streaky
- If not, repeat cooling and reheating
PART 4: ASSEMBLE THE BARS (20-30 minutes)
-
Prepare molds:
- Ensure chocolate bar molds are clean and completely dry
- OR line loaf pan with parchment paper
- Have everything ready before starting (chocolate sets quickly)
-
Create bottom layer:
- Pour/spoon half the tempered chocolate into molds
- OR spread thin layer in bottom of loaf pan
- Tap mold firmly on counter to release air bubbles
- Ensure chocolate reaches all edges
- Should be about 1/4 inch thick
-
Partially set bottom:
- Place in refrigerator for 5-8 minutes
- Should be set but still slightly tacky when touched
- Not fully hard yet
-
Add kataifi to cream NOW:
- Gently fold cooled, toasted kataifi into pistachio cream
- Mix until evenly distributed
- Don't overmix or kataifi will break down too much
-
Add filling layer:
- Remove molds from refrigerator
- Spoon pistachio-kataifi mixture onto chocolate base
- Spread evenly with offset spatula
- Leave 1/4 inch border around edges
- Press down gently to eliminate air pockets
- Surface should be roughly level
-
Seal with chocolate top:
- If chocolate has cooled below working temp, reheat gently to 88-91°F
- Pour remaining tempered chocolate over filling
- Spread to cover completely
- Ensure filling is fully sealed
- Tap mold to level and remove bubbles
- Smooth top with offset spatula or bench scraper
-
Final setting:
- Place in refrigerator for 30-45 minutes
- OR at cool room temperature for 2-3 hours
- Should be completely firm before unmolding
PART 5: UNMOLD AND FINISH (5-10 minutes)
-
Unmold carefully:
- If using silicone molds: flex gently and bars should pop out
- If using loaf pan: lift out using parchment, then cut into bars
- If stuck: Place in freezer for 10 minutes, try again
-
Cut if needed:
- For loaf pan method: Cut into individual bars with sharp knife
- Warm knife under hot water, wipe dry between cuts
- Cut slowly and cleanly
-
Final touches:
- Wipe any fingerprints with soft cloth
- Trim rough edges if needed
- Admire your work!
Timeline Summary
- Active time: 1.5-2 hours
- Passive time (setting): 1-3 hours
- Total time: 2.5-5 hours
Yield and Storage
Makes: 4-6 bars depending on mold size
Storage:
- Room temperature: 2-3 weeks in airtight container
- Refrigerated: 4-6 weeks
- Frozen: Up to 3 months
Best served: At room temperature for optimal texture and flavor
Continue reading for detailed sections on perfecting each component, troubleshooting, variations, and advanced techniques...
15. True Cost Analysis
Let's break down the real economics of homemade Dubai chocolate.
First Batch Costs
Equipment (One-Time Investment):
- Thermometer: $20
- Molds: $15
- Spatulas: $8
- Scale: $20
- Misc tools: $10
- Total Equipment: $73
Ingredients (For 4 Bars):
- Chocolate: $15
- Pistachio butter: $12
- Kataifi: $5
- Tahini: $4
- Other ingredients: $3
- Total Ingredients: $39
First Batch Total: $112
Cost Per Bar (First Batch): $28
More expensive than buying Fix! But wait...
Second Batch Costs
Equipment: $0 (already own it)
Ingredients (For 4 Bars): $39
Cost Per Bar (Second Batch): $9.75
Now we're saving money compared to Fix's $20!
Tenth Batch Costs
By your tenth batch:
- Equipment cost amortized: $7.30 per batch
- Ingredients: $39 per batch
- Total: $46.30 for 4 bars
- Cost Per Bar: $11.58
Break-Even Analysis
Compared to Fix ($20/bar):
- Savings per bar after equipment: $10.25
- Equipment cost: $73
- Break-even: After 8 bars (2 batches)
- After that, save $10+ per bar
Compared to Scalpers ($50/bar):
- Break even after just 2 bars!
- Massive savings if you would have paid scalper prices
Scaling Economics
Making 12 Bars at Once:
- Ingredient costs: $95
- Time: Only 30% more than making 4 bars
- Cost per bar: $7.92
Making 24 Bars:
- Ingredient costs: $175
- Bulk discounts possible
- Cost per bar: $7.29
Time Value Considerations
Should also consider your time:
Scenario 1: Your time is worth $15/hour
- 3 hours to make 4 bars = $45 of your time
- Plus $39 ingredients = $84 total
- Per bar: $21
- Verdict: Just buy Fix (if available)
Scenario 2: Your time is worth $25/hour
- 3 hours = $75 of your time
- Plus $39 ingredients = $114 total
- Per bar: $28.50
- Verdict: Definitely not worth it financially
Scenario 3: You value the experience/fun
- Time is entertainment, not work
- Learning experience has value
- Only count ingredient costs
- Verdict: Very economical hobby
When DIY Makes Financial Sense
DIY is economical if:
- Making 8+ bars (past break-even point)
- Making for large events (economies of scale)
- Can't access Fix at retail prices
- Would otherwise pay scalper prices
- Enjoy the process (time not counted as cost)
- Gifting (homemade adds value beyond cost)
Just buy Fix if:
- Only want 1-2 bars
- Time is very valuable to you
- Can access Fix at normal retail
- Don't enjoy cooking projects
Hidden Costs
Don't forget:
- Electricity for oven/equipment
- Water for cleanup
- Failed batches (happens to everyone)
- Kitchen mess/cleanup time
- Packaging materials if gifting
Add roughly $3-5 per batch for these factors
The Final Verdict
Pure Economics: DIY becomes cheaper after 2-3 batches, assuming you value the process
Overall Value: Consider:
- Customization options you can't buy
- Skill development
- Gift-giving impact
- Satisfaction of creation
- Entertainment value
For many people, these factors make DIY worthwhile even when pure financial calculation is neutral.
Article continues with more sections on quality comparison, selling legality, advanced techniques, and comprehensive FAQs...